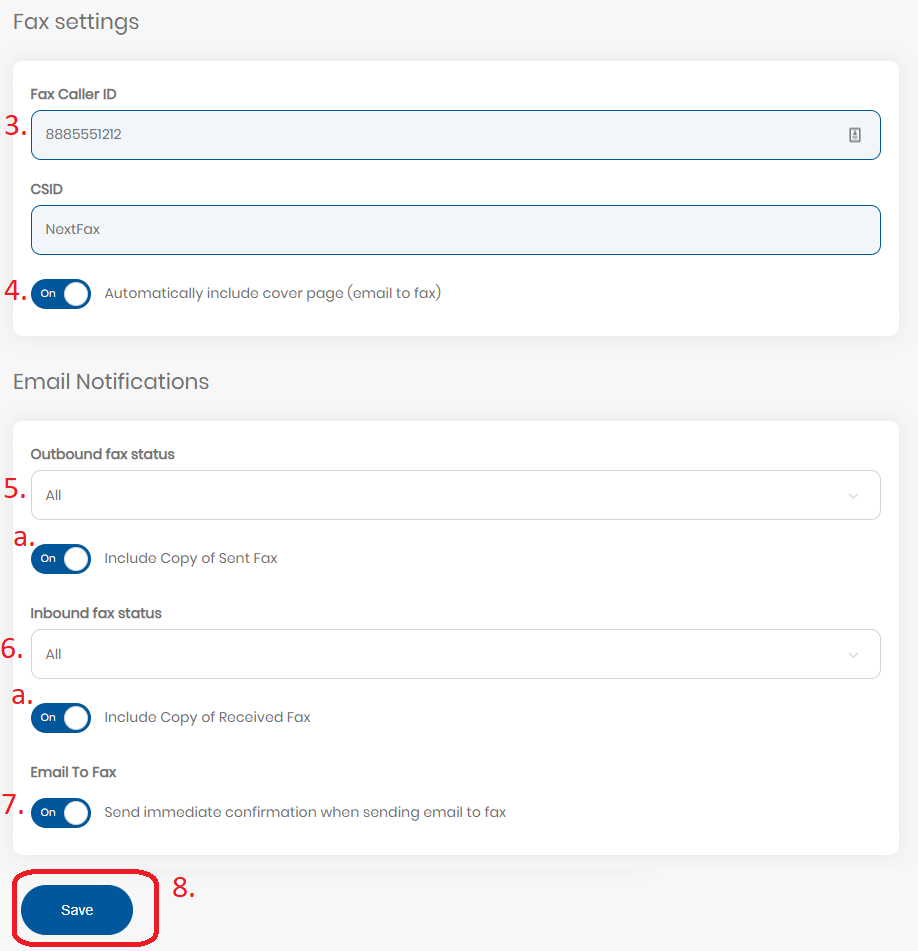
This section allows you to control when you receive notifications and email attachments, as well as other fax settings.
1. Navigate to Settings menu by clicking your username in the top right corner, then clicking “Settings” in the dropdown.
2. Click the Fax icon at the top
3. You can change you fax Caller ID by typing a new number in the “Fax Caller ID field”. Scroll to the bottom and click “Save” to confirm the changes.
a. Default Caller ID is inherited from the Account’s default.
4. Automatically include cover page – toggle this setting to include a cover page automatically when sending a fax from email. This will allow you to include the subject line and body of the email as a cover page.
5. Outbound fax status – select from dropdown which outbound fax events will send you an emailed status update
a. Include Copy of Sent Fax – toggle whether those emails include an attached copy of the fax
6. Inbound fax status – this setting allows you to receive new faxes in your email. Select from dropdown which inbound fax events will send you an emailed status update
a. Include Copy of Received Fax – toggle whether those emails include an attached copy of the fax
7. Email To Fax – toggle whether you receive a fax status confirmation immediately after sending an Email to Fax
8. Scroll to the bottom and click “Save” to confirm the changes.
Need more help with this?
Don’t hesitate to contact us here.


